Registering a Printer from Your Printer Panel
Before you register the printer and create your user account, you need to connect your printer to the network so that it can be used from a computer. Follow the instructions in the printer's manual to perform the initial setup and network setup.
 |
Turn on the printer.
|
 |
Tap Settings > (General Settings >) Web Service Settings > Epson Connect Services > Register > Start Setup on the printer's home screen.
|
 |
The registration sheet is printed.
|
 Note:
Note:|
If the setup fails, check for the issue using one of the following methods.
(1) Check Settings > (General Settings) > Web Service Settings > Epson Connect Services on the printer's control panel.
If Registration shows Unregistered, registration with Epson Connect has failed. Check the service status on the Epson Connect portal page. Also, review this FAQ.
If Connection shows Disconnected, the printer is not communicating. Check your internet environment using this FAQ as a reference.
(2) Print the Network Status Sheet (*) from the printer and check the Epson Connect section.
If HTTPS Status does not show Connected, the printer is not communicating. Check your internet environment using this FAQ as a reference.
If XMPP Status does not show Connected, the printer is not communicating. Check your internet environment using this FAQ as a reference.
(*) For instructions on printing the Network Status Sheet, see the printer's manual.
|
 |
Access the registration page using a computer, smartphone, or tablet device.
|
 |
Enter the authentication code and click (tap) Next.
If you scanned a QR code to access the registration page, the authentication code has already been entered.
|
 |
Review the Terms of Use and Privacy Statement and select the check boxes.
|
 |
Click (tap) Next.
|

For users with an Epson Global ID
|
Click (tap) Login.
|
|
Enter the email address and password registered in Epson Global ID, and then click (tap) Login.
|
|
On the "Two-step Verification" screen, enter the verification code received by email, and then click (tap) Verify.
|
When the printer is registered to the entered user account correctly, a setup information sheet is printed. A notification email is sent to the registered email address.
Epson Connect services are now ready for use.
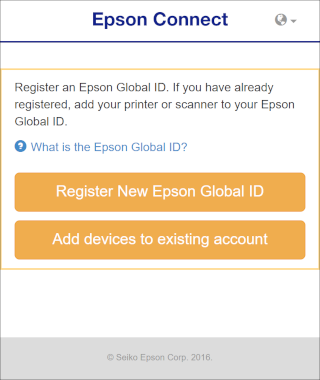
For users without an Epson Global ID
|
Click (tap) Create Account.
|
|
On the "Register New Epson Global ID" screen, enter an email address and password, select your country or region, and then click (tap) Send Verification Email.
|
An email is sent to the address you registered with the code required for registration.
|
On the "Verify Email Address" screen, enter the verification code you received, and then click (tap) Verify.
|
When the printer is registered to the entered user account correctly, a setup information sheet is printed. A notification email is sent to the registered email address.
Epson Connect services are now ready for use.